Disclosure: This post (probably) contains affiliate links. If you click on one, I may make a small commission. Of course, this will come at no extra cost to you and helps keep this site running.
With its mountains, forests, and coastline, Japan is a great destination for hikers. And one of the country’s most popular hiking routes is the Kumano Kodo, a pilgrimage route not far from Osaka and Kyoto.
Walking the Kumano Kodo is among my most cherished Japan experiences so far, especially since I did it all solo. Planning the hike wasn’t too easy, though, so here’s my experience organising and completing 4 days of walking the Kumano Kodo on my own.
What is the Kumano Kodo Pilgrimage?

Alongside the Nakasendo Trail, the Kumano Kodo is one of Japan’s most iconic walking routes.
It’s a collection of pilgrimage walking routes that lead to the Three Grand Shrines of Kumano on the Kii Peninsula. The Kii Peninsula is a mostly forested, mountainous area on Honshu near Osaka.
The walking routes come from different corners of the peninsula, but they primarily cover Wakayama Prefecture, as that’s where all three of the grand Shinto shrines are found.
People from all levels of Japanese society used to trek these pilgrimage routes as an act of devotion and spiritual recovery.
Like the Camino de Santiago, this pilgrimage route now appeals to people worldwide, regardless of faith or spirituality. That’s because it’s a well-established and well-supported walking network that takes people past shrines, temples, and waterfalls along the way.
Which route should you pick?

The first big decision for people looking to trek the Kumano Kodo is which route you’re going to take.
You have a handful of different routes to choose from, each with its own starting point, duration, terrain, and end point. That said, most Kumano Kodo routes end at one of the Three Grand Shrines of Kumano, usually Kumano Hongu Taisha.
The main routes, at least those now included as UNESCO World Heritage sites, are:
I walked the Nakahechi Route, the most common Kumano Kodo trek. It was a 4-day walk from Tanabe to Kumano Hongu Taisha, then down to Kumano-Nachi Grand Shrine. This route took me to two of the grand shrines, but you can extend it to cover all three, the last being Kumano Hayatama Taisha in Shingu.
And in all honesty, the Nakahechi Route is the natural choice, thanks to its infrastructure, easy access, and flexibility.
I’ll explain the Nakahechi Route in more detail later, but a few words on the other routes.
The Kochechi Route from Koyasan is a harder trek through the mountains and seems to have less infrastructure.
With the Ohechi Route, you follow the coast, but the recommended tourist routes only go so far.
Finally, the Iseji Route is an incredibly long route from the holy city of Ise, and it varies from rice paddies to beaches.
When to hike the Kumano Kodo

The most popular times to visit Japan generally are spring and autumn, and I’d argue these are also the best times for the Kumano Kodo.
The spring months of April and May and autumn months of late September and October provide the nicest temperatures for hiking and seasonal colour. It will be a little cooler up in the mountains than by the seaside, but not so bad that you need to pack totally differently from the rest of your trip.
The main downside is the chance of rain, as there’s a decent chance of a day or two of showers. Still, summer has more rain, humidity, and high temperatures, making it seem much less appealing.
You’re also reliant on when the local tourism businesses expect visitors, as the already limited resources may be unavailable in the depths of winter.
I hiked in early-mid May and experienced everything from consistent rain to glorious blue skies, and cool but comfortable evenings.
Just make sure to avoid Japanese public holidays, as an increase in well-organised local travellers limits availability for things like accommodation.
How to reach the Kumano Kodo Nakahechi Route
Working out how to fit the Kumano Kodo into your Japan itinerary means understanding how you’ll get there.
The two ends of the Nakahechi Route are the city of Tanabe and the Kumano-Nachi Grand Shrine near the village of Katsuura. You don’t actually start walking in Tanabe, but more on that in a bit.
When walking four days of the Nakahechi Route, Tanabe is the more common starting point.
To reach Tanabe, take the earliest train to Kii Tanabe Station from Osaka/Wakayama to give yourself more time on the first day.
Most people travel from Osaka, with two different train routes (direct or via Wakayama) that get you there at 8:42/9:58.
However, I mention Wakayama because I liked visiting the city, and it gives you an earlier option that arrives at 7:49. This matters because it gets you on the first buses of the day from Kii Tanabe.
You need to take a 40-minute bus (the #93 or #95) at around 8:30 from Kii Tanabe to the Kumano Kodo Kan Pilgrimage Center or the Nakahechi bus stop. These are your options to start the walk.
Buses on this route aren’t frequent, so you need to time your arrival in Tanabe. Arriving from Osaka at 8:42 puts you on a bus almost two hours later than the earlier Wakayama option!
At other points during your trek, the local buses can be very useful, including reaching accommodation in different villages, such as Yunomine Onsen.
Logistics at the other end of the trek are nice and simple. Take the #31 bus down the hill to either Nachi Station or Kii-Katsuura Station. From there, you can go to your accommodation or take a train onward to Wakayama (towards Osaka) or Ise (towards Nagoya).
Where to stay on the Kumano Kodo Nakahechi Route

The biggest challenge in planning your own Kumano Kodo trek, rather than taking a tour, is booking accommodation along the route.
While Tanabe and Katsuura may have hotels, most accommodation along the route is small guesthouses.
Finding available accommodation can be tricky, as each small lodging has its own system. Some require you to call or email them to enquire about a booking, while others have a website fully in Japanese.
The Kumano Kodo tourism bureau has accommodation lists as a useful starting point, but I mostly found everything was booked out already, a couple of months in advance.
My approach was to check Google Maps, Booking.com, and Airbnb to find a wide enough selection of places that I could easily book online.
And yes, you definitely need to organise accommodation well in advance. This is where it helps to have some flexibility in your schedule, as you may have to check different dates to find a series of bookings that works.
Koguchi
The hardest place to find accommodation on the Nakahechi Route is Koguchi. This village has few options, some of which are a long way from the actual village.
Even tour companies have difficulty finding accommodation in Koguchi, and often have a caveat that you may need to stay elsewhere if they can’t book anything.
My solution to the Koguchi problem was to stay at Hongu Taisha two nights. Rather than walk to Koguchi on Day 3, I took a bus there in the morning and walked back. You could also walk there and bus back if the timing works.
Yunomine Onsen
The other place I want to mention is Yunomine Onsen. This hot spring resort is near Hongu Taisha and is a popular place to stay, since you can soak in the onsen after a day of hiking.
But it’s a little awkward adding it to your route. You either turn off before Hongu Taisha to reach Yunomine Onsen, or go to Kumano Hongu Taisha and then walk/bus over to your accommodation.
I talked to people who stayed here, and they really enjoyed it. It’s also a good choice if you’re only doing 1-2 days of walking, since you can base yourself there.
Recommendations
The accommodations I used for my four nights, all of which were great, were:
What to pack for the Kumano Kodo
 People who are familiar with multi-day hikes won’t need my advice here.
But if you’re less experienced doing these hikes solo, as I am, a quick packing list can help.
A small-to-medium hiking pack should be plenty big enough to fit what you need for a few days. Inside it, you’ll have layered clothes for the trek, snacks, water bottle(s), and maybe one post-hike outfit to feel fresh each evening.
Layers of outdoors-suitable clothes are the way to go, as you’ll warm up and cool off as you go, depending on the environment and inclines/declines. I don’t like the idea that you must wear merino wool or specific brands or types of clothes, but anything that wicks sweat and keeps you comfortable is definitely useful.
What I think is less negotiable is good footwear. Trail runners or hiking boots will make life much easier, especially with wet stairs and muddy terrain. The rest of your Japan trip will suck if your only trainers are caked in mud or soaked through. Oh, and spare socks are a lightweight luxury!
You also want to prepare for both rain and sun. I went from bucketing rain right at the start of Day 1 to blazing sun on Day 3. This means a rain jacket, waterproof backpack cover, hat, sunglasses, and sunscreen are all worth bringing.
Finally, something I wish I had done was get a walking stick at the visitor center or pack hiking poles. Especially over the last two days, you descend a lot of stone stairs, and anything to reduce the impact will help. You knees will thank you.
What to do with your other luggage?

But what about the rest of your belongings you don’t want to trek with?
Two options stand out. One is to store your belongings in lockers somewhere, e.g., Osaka, and then return to collect them after the trek.
The other is to use a luggage forwarding service and send your main luggage to the end. I did this from Wakayama, sending my suitcase to the guesthouse in Kii-Katsuura.
The front desk at my hotel in Wakayama kindly helped me arrange it, even calling the other accommodation to confirm all the details. When I reached Kii-Katsuura, it was there waiting for me, nice and safe.
What I like about this option is that you don’t need to retrace your steps and you only pack what you need for the trek. Plus, it was pretty cheap — a little over 2000 yen (~US$13). A storage locker or service may cost more.
You can arrange luggage forwarding through hotels and convenience stores. However, since all the form details often need to be in Japanese, getting help through your hotel is a huge help.
Kumano Kodo Pilgrimage Stampbook

One thing you’ll also want to collect before you start your trek is the Kumano Kodo Pilgrimage Stampbook.
Available at the Tourist Information Center and the Kumano Kodo Kan Pilgrimage Center in Takijirioji, it’s a small book you take with you on your hike.
The trek takes you past many shrines, some of which have a small stand with a stamp and ink inside. Simply stamp your book at each shrine, and you have special proof that you’ve hiked the pilgrimage route.
What’s neat is that it’s a combined book for both the Kumano Kodo and the Camino de Santiago. I’m sure it’s a rare group that has both.
I was a little overeager and had never collected the book before starting. Thankfully, the staff at Kumano Hongu Taisha were kind enough to help me out.
They gave me the main Kumano Kodo stamp after I showed them my photos from the first few days. This felt like an exception, so don’t rely on it. Once I got the book, I made sure to go back and get a few of the local stamps from places I’d been.
After learning my lesson, I was diligent about getting more on the way to the Kumano-Nachi Grand Shrine.
Things to know when planning your trek

Food
Beyond transport, accommodation, and packing, a few other odds and ends are worth mentioning.
For one, you’ll need to be mindful of planning where you’re going to get food.
Both Chikatsuyu and Hongu had reasonable supermarkets where you could get supplies. Meanwhile, Ukegawa has a convenience store where I got lunch on Day 3.
I also spotted two cafes in Chikatsuyu open before 8 am if you want a proper breakfast.
Hongu also has restaurants, but they almost take turns about which days they’re open in the evening. The ramen at Mitsuashi was good and worth recommending.
Bears
From food we move to bears.
Yes, there are bears in the forests you’ll be trekking through, much like other outdoor destinations in Japan. Attacks aren’t common, but precautions like bear bells you can buy are worthwhile.
If you’ve walked the Nakasendo Trail, you may have seen the bell system that they encourage you to use. You won’t find that here, so a dangly bell on your pack or social noise is the next best thing.
Navigation
Something you will encounter a fair few of are trail markers.
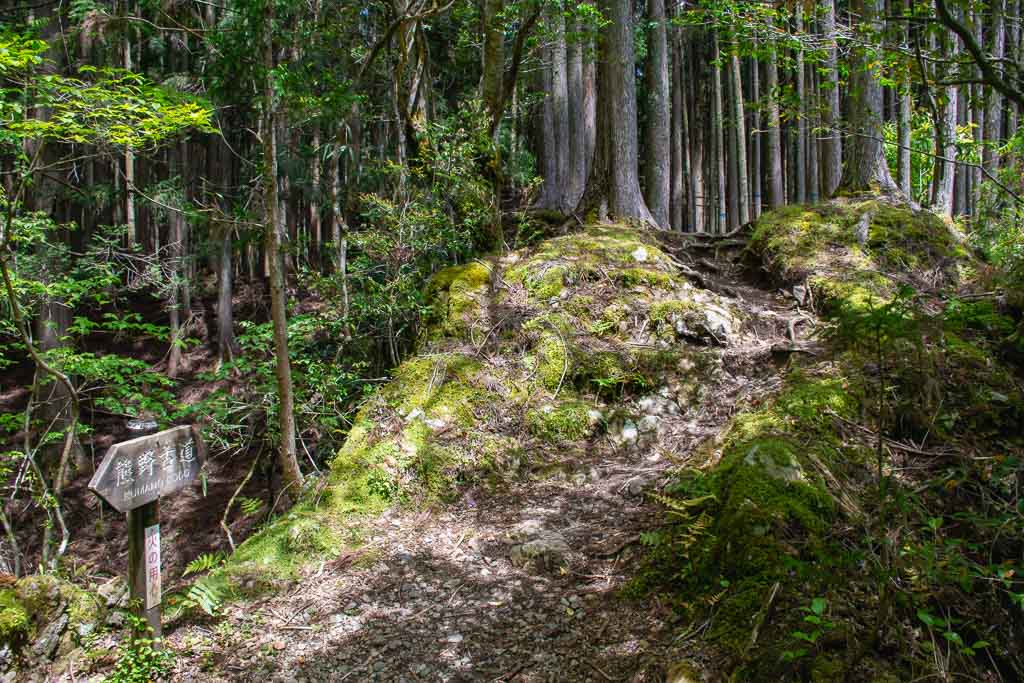
Wooden signs saying “Kumano Kodo” are fairly frequent, and you’ll find descriptive signposts for trailheads around the villages and towns. My problem with the regular signs is that they often don’t say where you’re heading or what the next landmark is. That can be a problem when you reach a poorly-marked crossing or intersection.
Have the maps downloaded on your phone so you can find your way. I had to help several people off on day hikes, including some lost Japanese fishermen who thought it was hilarious I knew what they didn’t.
The official maps provided are useful to have, even though they’re static images. They show the landmarks along the route so you can track your progress.
When there were track closures, often due to landslides, it was well marked, and they provided alternative walking routes. I think some of the detours have been around for years.
Is it all walking alone?
Because you’re walking in the forest and mountains, the trek can be quite isolating at times.
You may encounter other groups, but people tend to walk in the same direction, so crossing paths isn’t common.
It helps if you’re starting at a similar time to others, as you can group together for a while. I managed to walk with another Australian twice this way. If you’re worried about hiking alone, find other people staying where you are or nearby and make plans to walk together.
What was nice was that as the days went by, I saw a familiar face or two, and we ended up forming a small group by the end and getting dinner together in Katsuura.
Do I have to do the whole thing?
No, of course not.
Even the four days I did wasn’t technically all of it, since I never went to Kumano Hayatama Taisha or went on the Kumano traditional boat ride.
For a shorter trip, I’d suggest going to Hongu and then walking one way and using the bus the other. Alternatively, take a bus to Koguchi from Shingu and then walk to Kumano-Nachi Grand Shrine.
Walking the Nakahechi Route

So far I’ve focused on the planning and logistics of the Kumano Kodo trek, because it takes work to set up. But it’s all worth it when you actually get to walking the Nakahechi Route.
Over four days, you walk from the Kumano Kodo Kan Pilgrimage Center to Kumano-Nachi Grand Shrine. Each day covers about 12-20 km (7-12 miles) of hiking up and down the trail through the Kii mountain range.
It’s a solid workout that makes you appreciate the flat sections.
Below is the day-to-day itinerary, and I think you’ll agree that ending at the beautiful waterfall and the temple/shrines around Kumano-Nachi Grand Shrine is the way to go.
Day 1 – Takijirioji to Chikatsuyu

After jumping off the bus at Takijiri, it’s across the river to the Kumano Kodo Kan Pilgrimage Center.
From there, it’s back over the footbridge, and the trail starts on the far side of the road by the Takijiriōji-gū Tōgō Shrine. This early stretch sets the tone, with a steep climb into the forest over a combination of stone steps and uneven root stairs.
It was a solid downpour for me at this stage, accompanied by the booming crack of a tree branch breaking off somewhere nearby. Together with a misty fog, it made this all an eerie start to the hike.

The first break from the forest is meant to reveal some views, but the fog ruled that out. It cleared a little by Takahara, about an hour into the walk.
The trail returns to the forest after that, and this is where I first found the local orange crabs that regularly scuttled across my path. You follow a gentler route here, with the track alternating between cobblestones and dirt, which can quickly turn to mud.
It was around here when I was humbled by a Japanese trail runner passing quickly by with his dog!
Small shrines are your only real landmarks until you suddenly reach a lookout overlooking Chikatsuyu across the river. From there, it’s an easy stroll to your first night’s stay.

Difficulty – 13.3 km (8.3 miles), over roughly 5 hours, with a difficulty rating of 1-3.
Day 2 – Chikatsuyu to Kumano Hongu Taisha

This is the longest day, not necessarily the hardest, but leaving early is wise. It was clear and sunny when I departed at 7:45.
Pick the trail back up at the Chikatsuyu-Oji Remains and walk through the village. At the edge of the village, a local woman pulled over to check on us and wish us luck for the day.
A gentle incline takes you along a village road, before eventually taking you back into the forest. You can make good time in the morning, but expect a few climbs again around noon.
Then you have the long overall descent for the rest of the day, which takes you past more shrines, but also abandoned settlements and some beautiful streams.

It’s in the afternoon, 3 pm for me, that you’ll reach one of the more noteworthy shrines, Hosshinmon-oji. With a bus stop just down the road, you start to feel like you’re returning to civilization here.
From here, it took me another 2 hours to reach Hongu, and I even passed some small tea fields. Chatting with the lost fisherman from Saitama probably slowed me down a bit on this section.
Upon reaching town, I spent a little while visiting Kumano Hongu Taisha before finding my guesthouse. It closes at 5 pm, so you may miss it if you’re too late.

Difficulty – 23.8 km (14.8 miles), over around 8-9 hours, with a difficulty rating of 2-3.
Day 3 – Koguchi to Kumano Hongu Taisha

To start walking from Koguchi, it first takes two buses: one to Kanmaru, then a local bus takes people through to Koguchi.
Get off at the last stop in Koguchi so that you can start by walking through this charming little valley village. A side path lets you detour around the tunnel over to the bridge at Kowaze with great views of the Akagi River.
Over the bridge, you’ll find a subtle sign on the left leading up stone steps, seemingly through people’s yards. Yes, this is the way.
Unfortunately, it’s all uphill to start, sometimes over steep and narrow steps. Most of the landmarks you encounter during the first half of the day are old ruins of teahouses that once supported pilgrims.

A great place to take a break on this hike is Hyakken-gura, a lookout whose view is said to cover the “3600 peaks of Kumano.”
It’s a nice downhill from there, on a slightly wider and gentler trail down to Ukegawa.
At Ukegawa, you can hop on a bus (timetable permitting) or take a 3 km hike back into the hills. You basically follow the main road along the big river until the side path appears.
This should have you back in Hongu by mid-to-early afternoon. Stop at the Kumano Hongu Taisha Otorii on the way in; it’s the largest torii gate in the world.

Difficulty – 16 km (10 miles), over roughly 5-6 hours, with a difficulty rating of 3-4.
Day 4 – Koguchi to Kumano-Nachi Grand Shrine

The last day starts the same as Day 3 with the buses to Koguchi. This time, though, you pick up the trailhead right in the village.
Look at the profile for Day 4, and you can immediately see it’s the hardest day. You not only reach the trek’s highest elevations (~800 metres), but it starts with a 700+ metre ascent right out of the gate.
It’s a workout, and I was a puffing mess of sweat and burning legs by the top. Unfortunately, then you start the rollercoaster of stone steps that undulate up and down over and over.
My notes from this last day aren’t great, both because of the effort and because I was walking with a slowly growing group. But I won’t forget that endless road of pale stone stairs anytime soon.
Eventually, it’s time to descend. Cue more never-ending steps, this time downward.

When you reach Nachikogen Park, it feels like the day has shifted. You’ve spent so long on the forest trails that this wide-open expanse feels weird.
It’s only another 15-20 minutes until you reach Kumano-Nachi Grand Shrine. It’s nice to explore this Shinto shrine and enjoy its views.
But around it are all sorts of Buddhist temples, including the iconic Seiganto-ji Temple. This is the 3-tiered pagoda you see in all the photos, with Nachi Waterfall in the background.
A view that rivals this one is looking up at Nachi Waterfall from the Hiro Shrine. The only problem is that it’s down another long series of steps, which you have to climb down and up to return to the bus stop to get to Shingu or Katsuura.

Difficulty – 14.5 km (9 miles), over roughly 5-6 hours, with a difficulty rating of 5.
Got questions about hiking the Kumano Kodo? I’ve tried to cover as much as possible, but let me know if there’s anything else you want or need to know.
